Niagara Stuff
Things that go boom!
Table of contents
- Export to blueprint
- Play audio
- High quality lights
- Pass a value to a material (dynamic material parameters)
Export to Blueprint
In general it's better to drive the particle simulation from blueprint or sequencer and not the other way round, because particle effects are just cosmetics and can be removed or delayed depending on on many settings (platform, server context, LoD, visibility, particle count, ...). But sometimes you just want to get those particle positions into a blueprint and do stuff with it and here is the way to do it. You have been warned!
There are two parts to this: first the Niagara effect needs to be set up to send the data and then the blueprint needs to be set up to actually get the data.
Niagara Setup
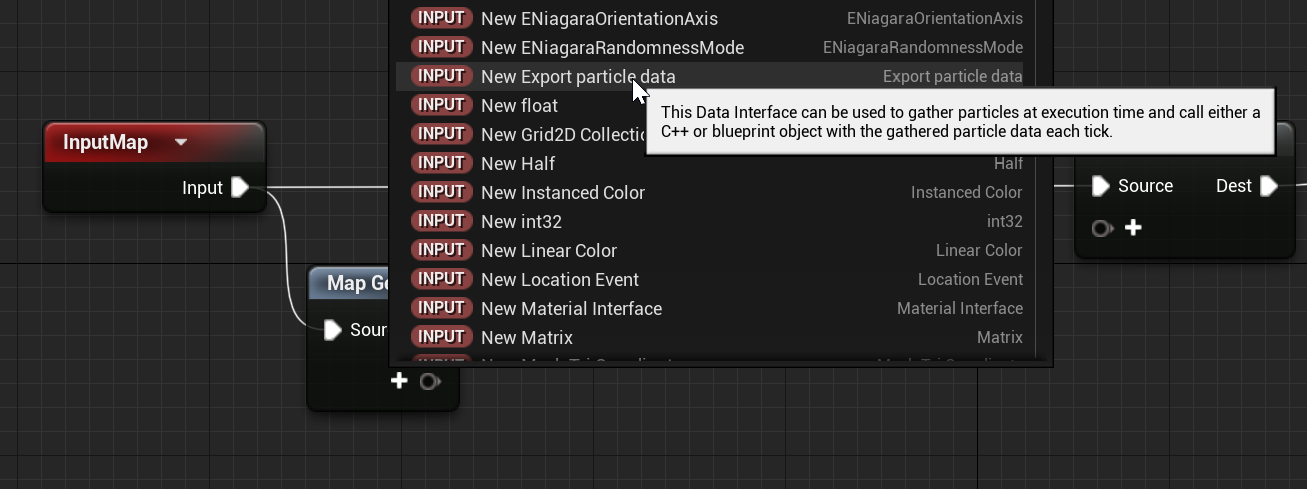
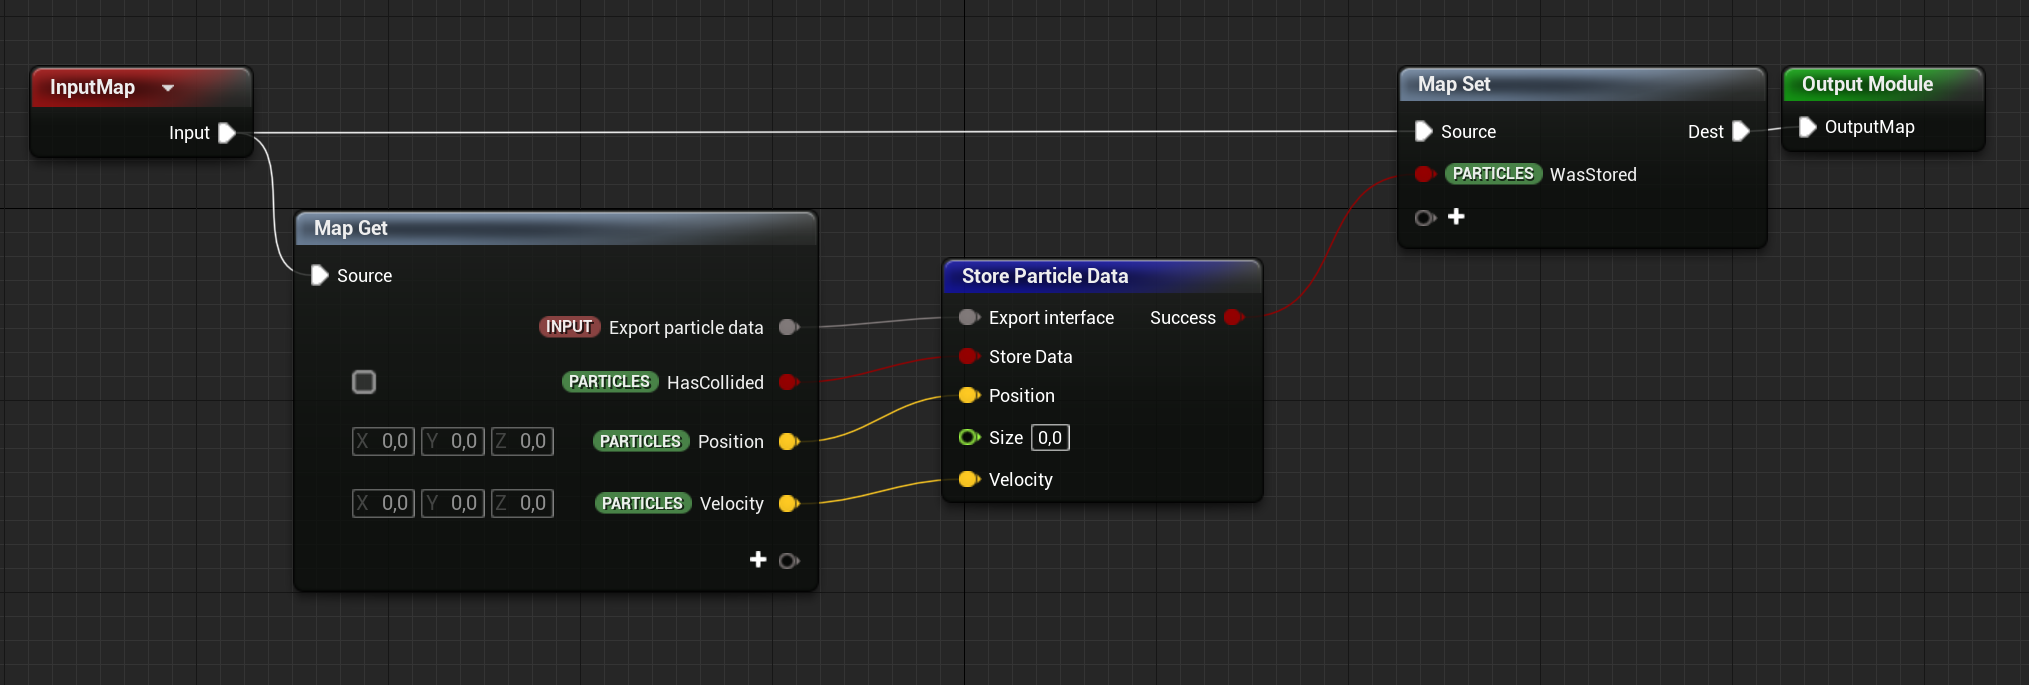
- Create a new module with the particle export DI as input. This is the data interface you need to use as module input. Here is an example module that export particle data when a collision has happened. Feel free to use whatever condition you want here for the "Store Data" parameter.
- Add the module to the Niagara system of your choosing.
- Create a new user parameter of type "Object" in your system.
- Select your module in the stack and set your new user param in the "Callback Handler Parameter" field.
Blueprint Setup
- Create a blueprint with your particle system as a component.
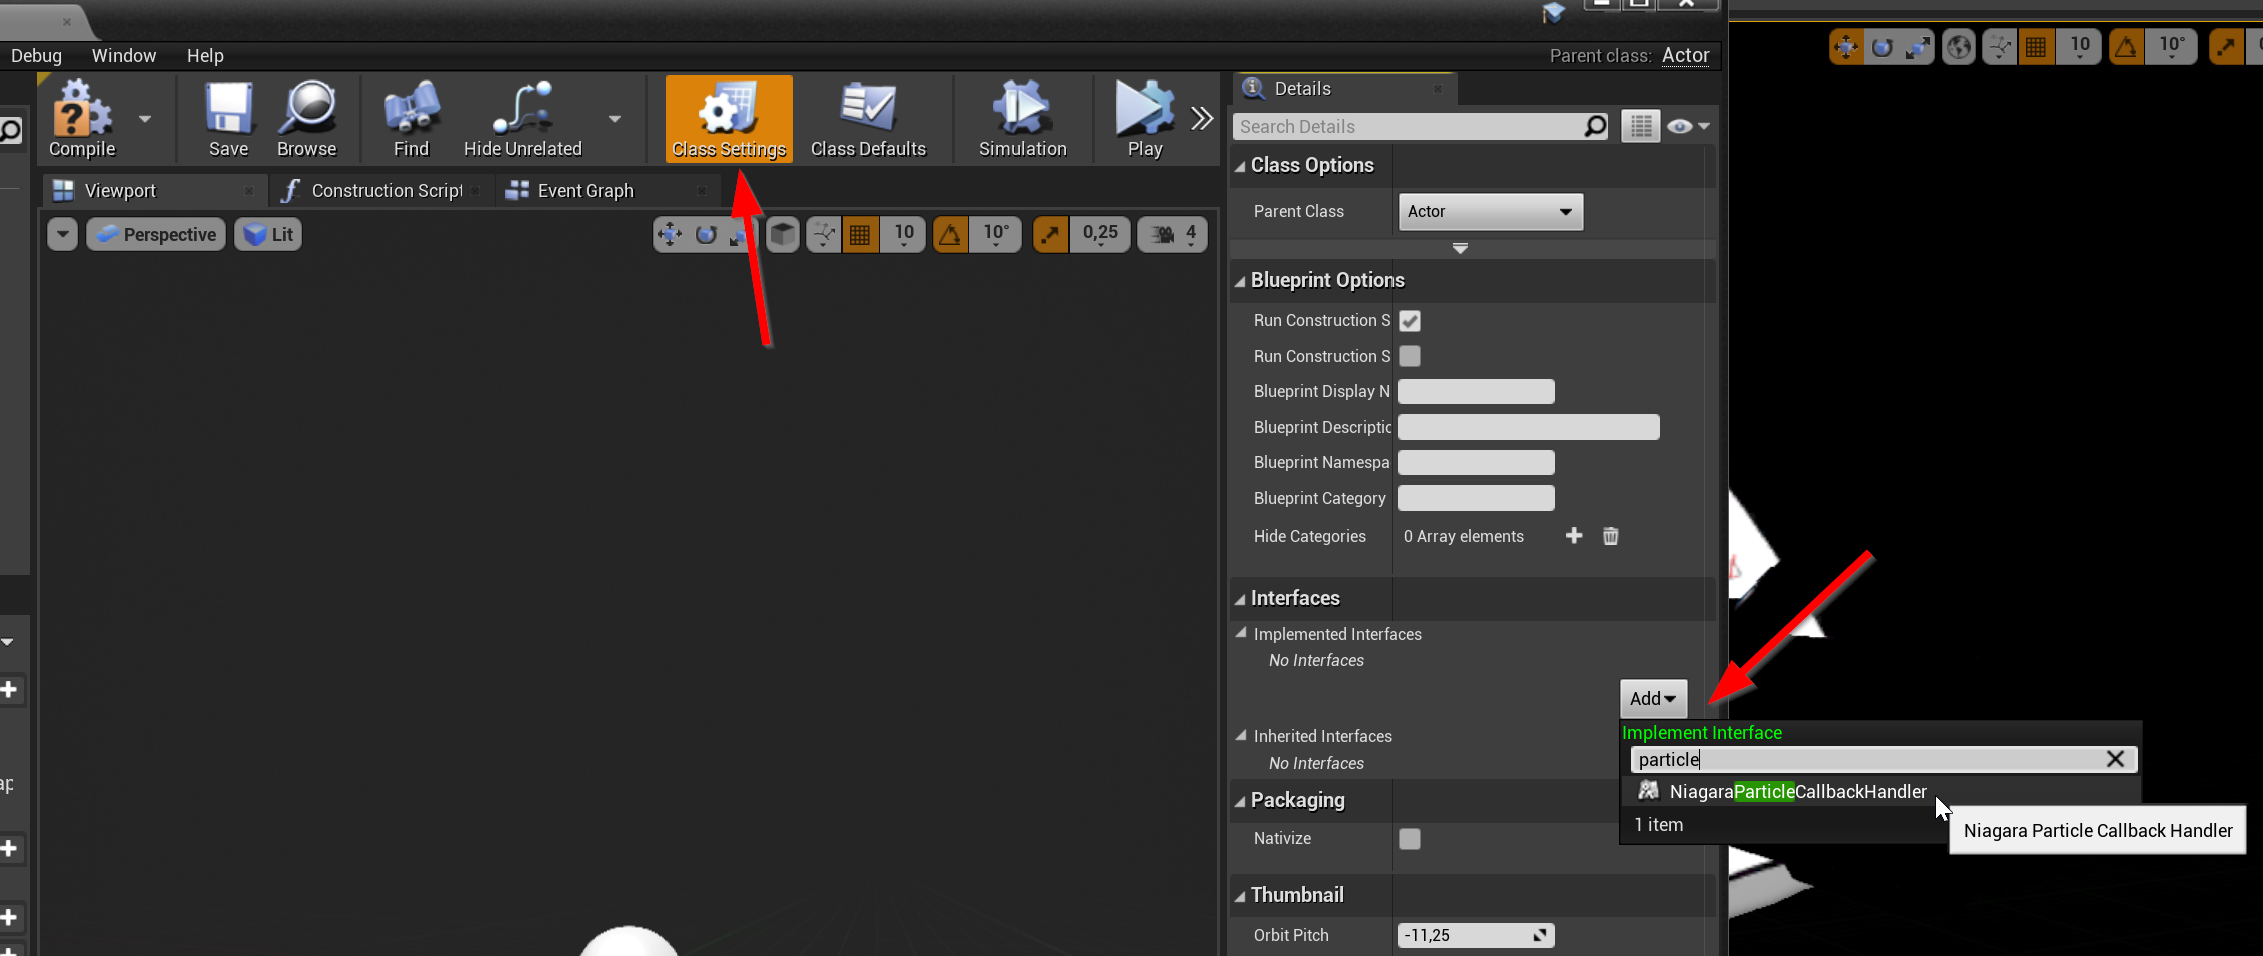
- Have your blueprint implement the NiagaraParticleCallbackHandler interface.
- Implement the interface function. This will create an event node that is called once per tick with your particle data. Go nuts here!
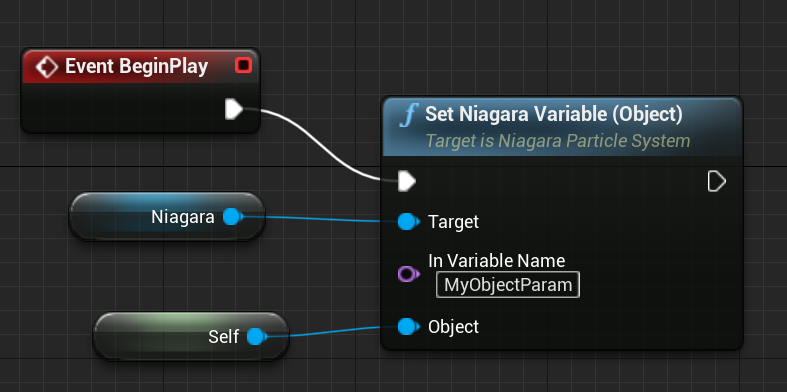
- Almost there, we just need to tell our Niagara system which blueprint to use by setting the user parameter we created before to our blueprint instance.
- Profit!!!
Play audio
You often want to play a sound at some point of the particle simulation, e.g. when a particle collides. You could export the particle data to Blueprint and trigger the audio effect there, but as of 4.26 there is an easier way!
There are two different solutions - one if you only need a one-shot "fire and forget" sound effect and another one for a more complex setup where you can control e.g. the pitch of the sound while it's playing.
One-shot sound effects
Note: sounds started this way keep playing even if the Niagara system is disabled or destroyed.
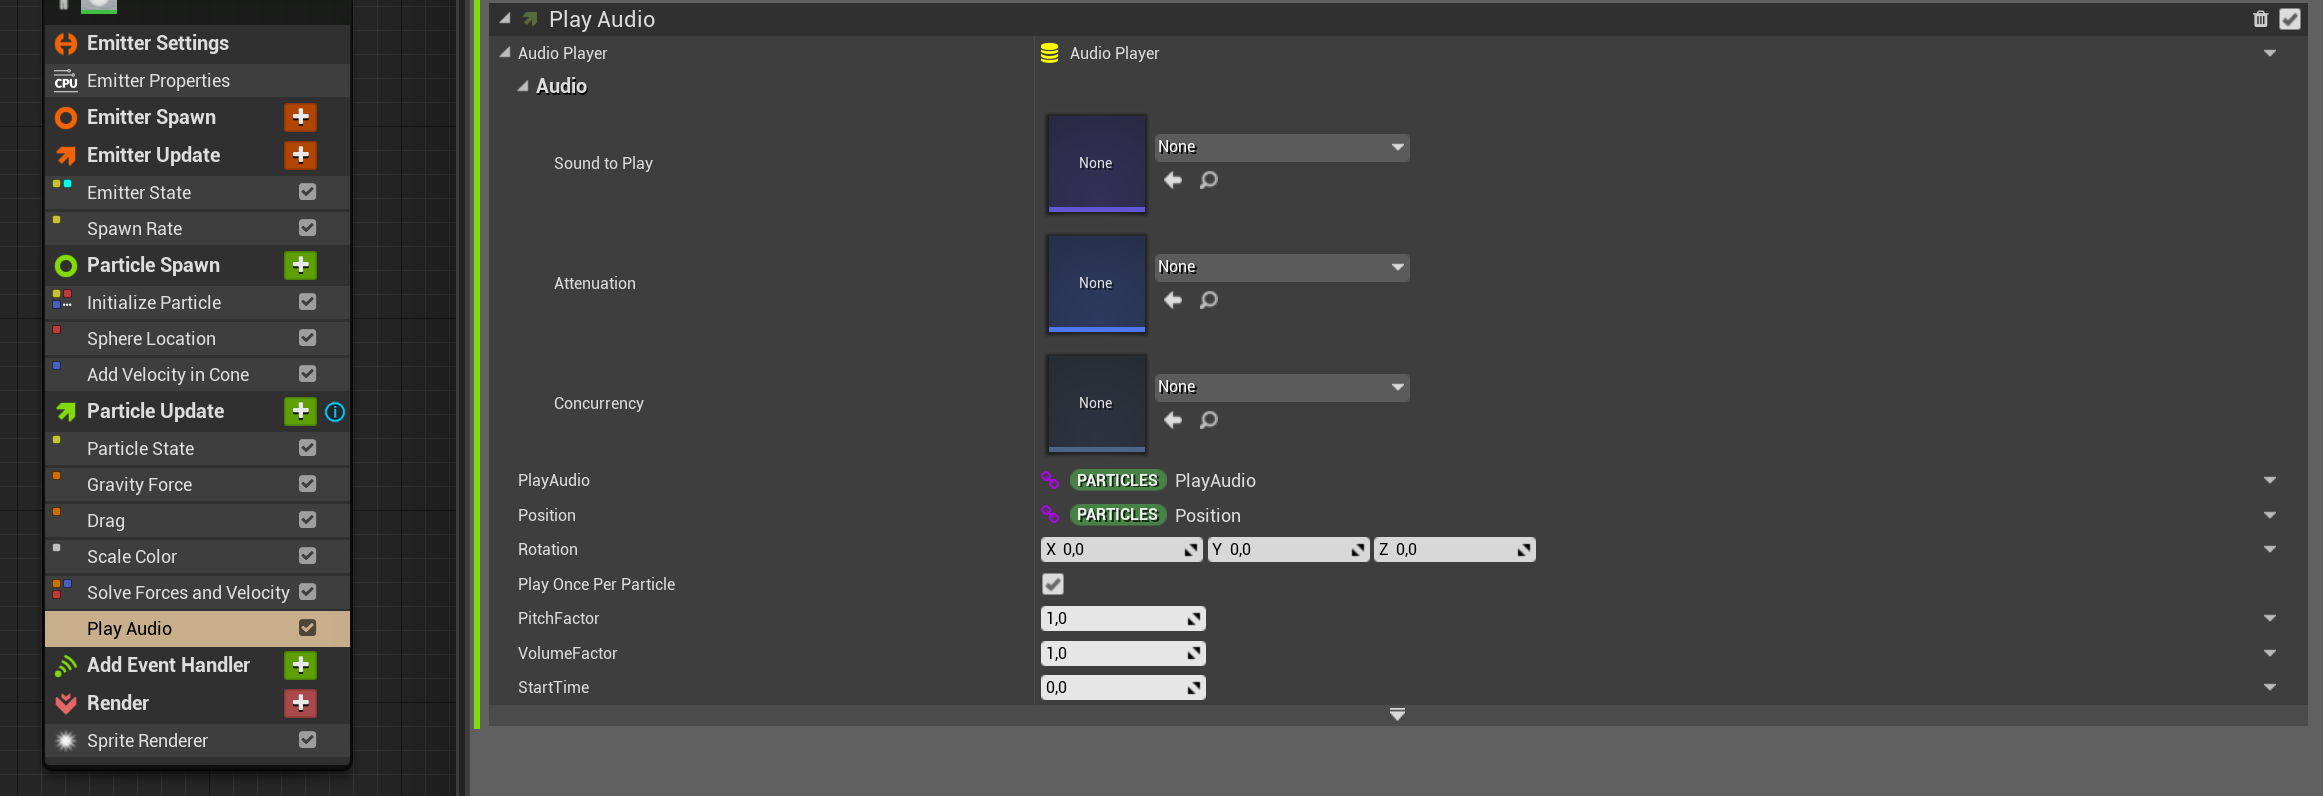
- Add the play audio module to your emitter and configure it.
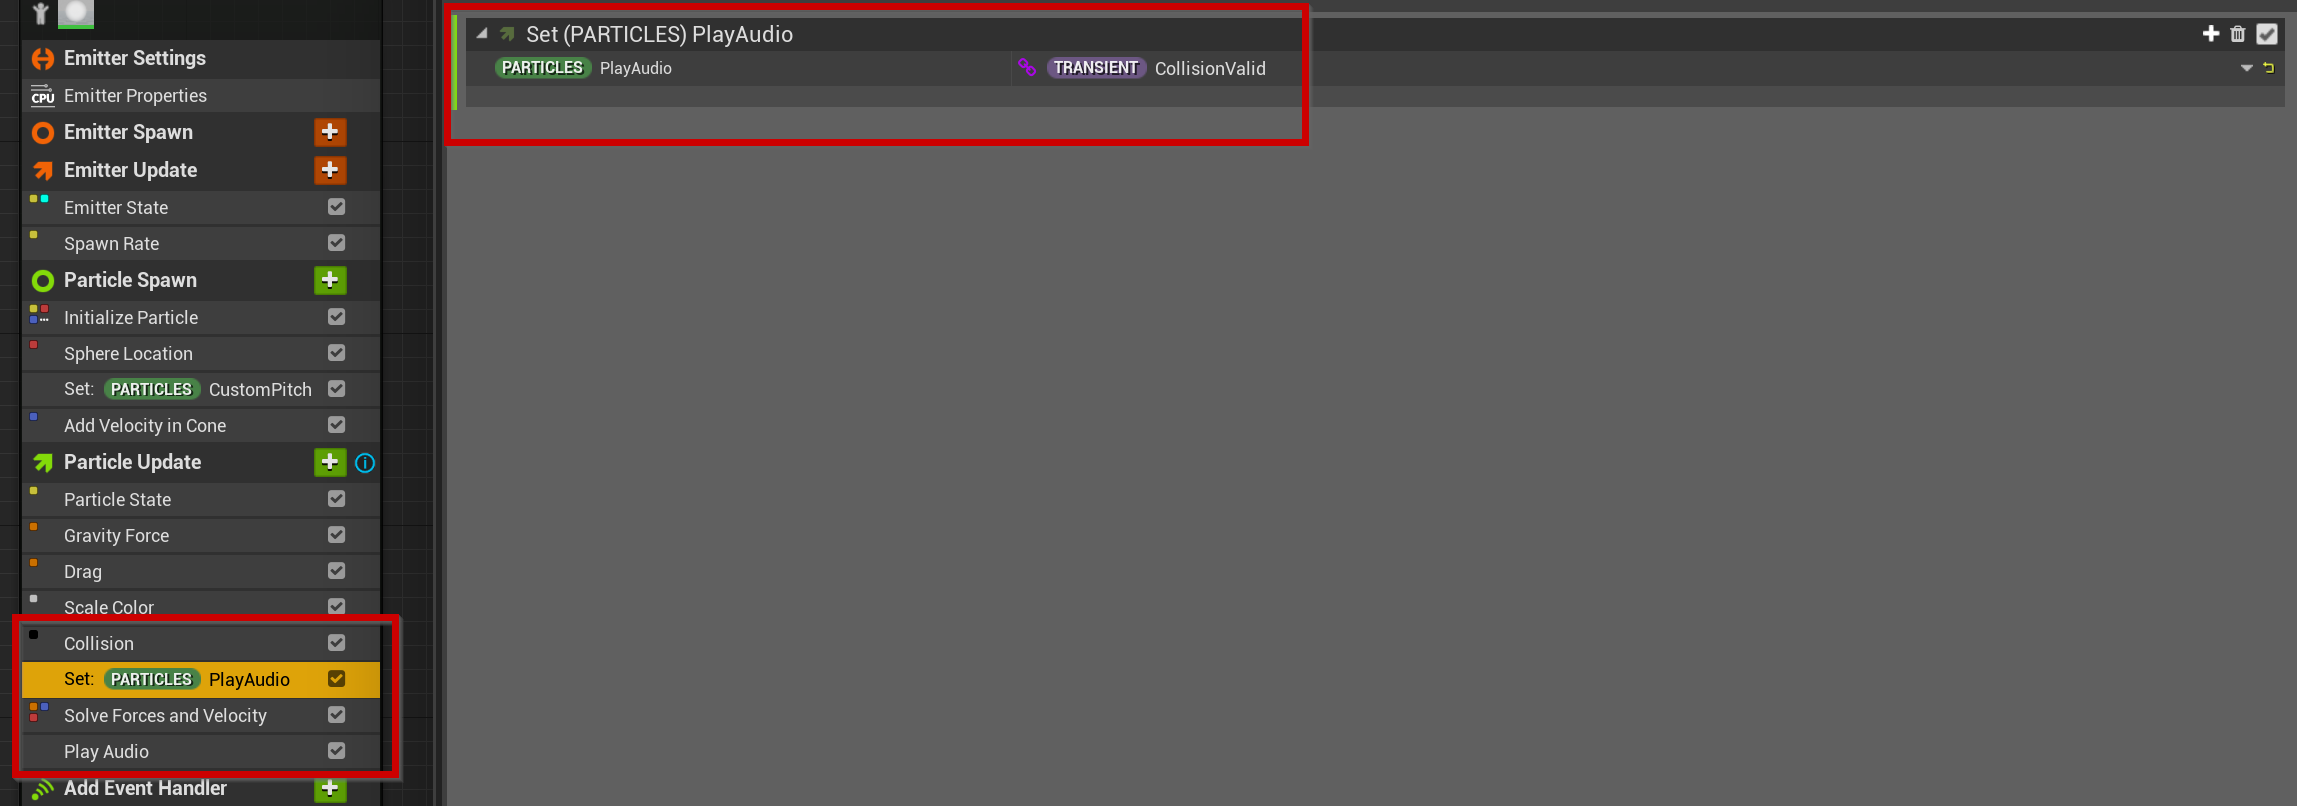
- Every time the module is evaluated, it checks the "Particles.PlayAudio" attribute and creates a sound effect if that attribute is set to true. Here is an example how to play audio every time a particle collides
Full control audio
Note: sounds started this way keep playing as long as the "Enabled Binding" evaluates to true and stop when the Niagara system is destroyed or reset.
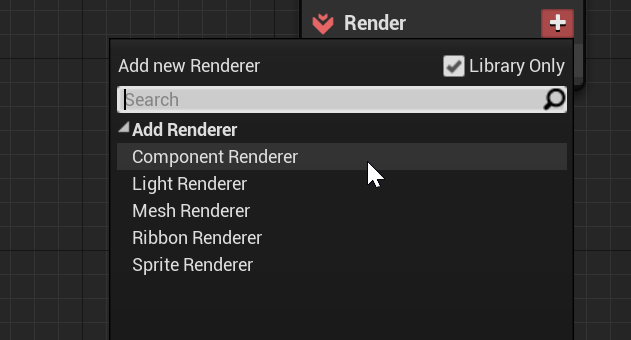
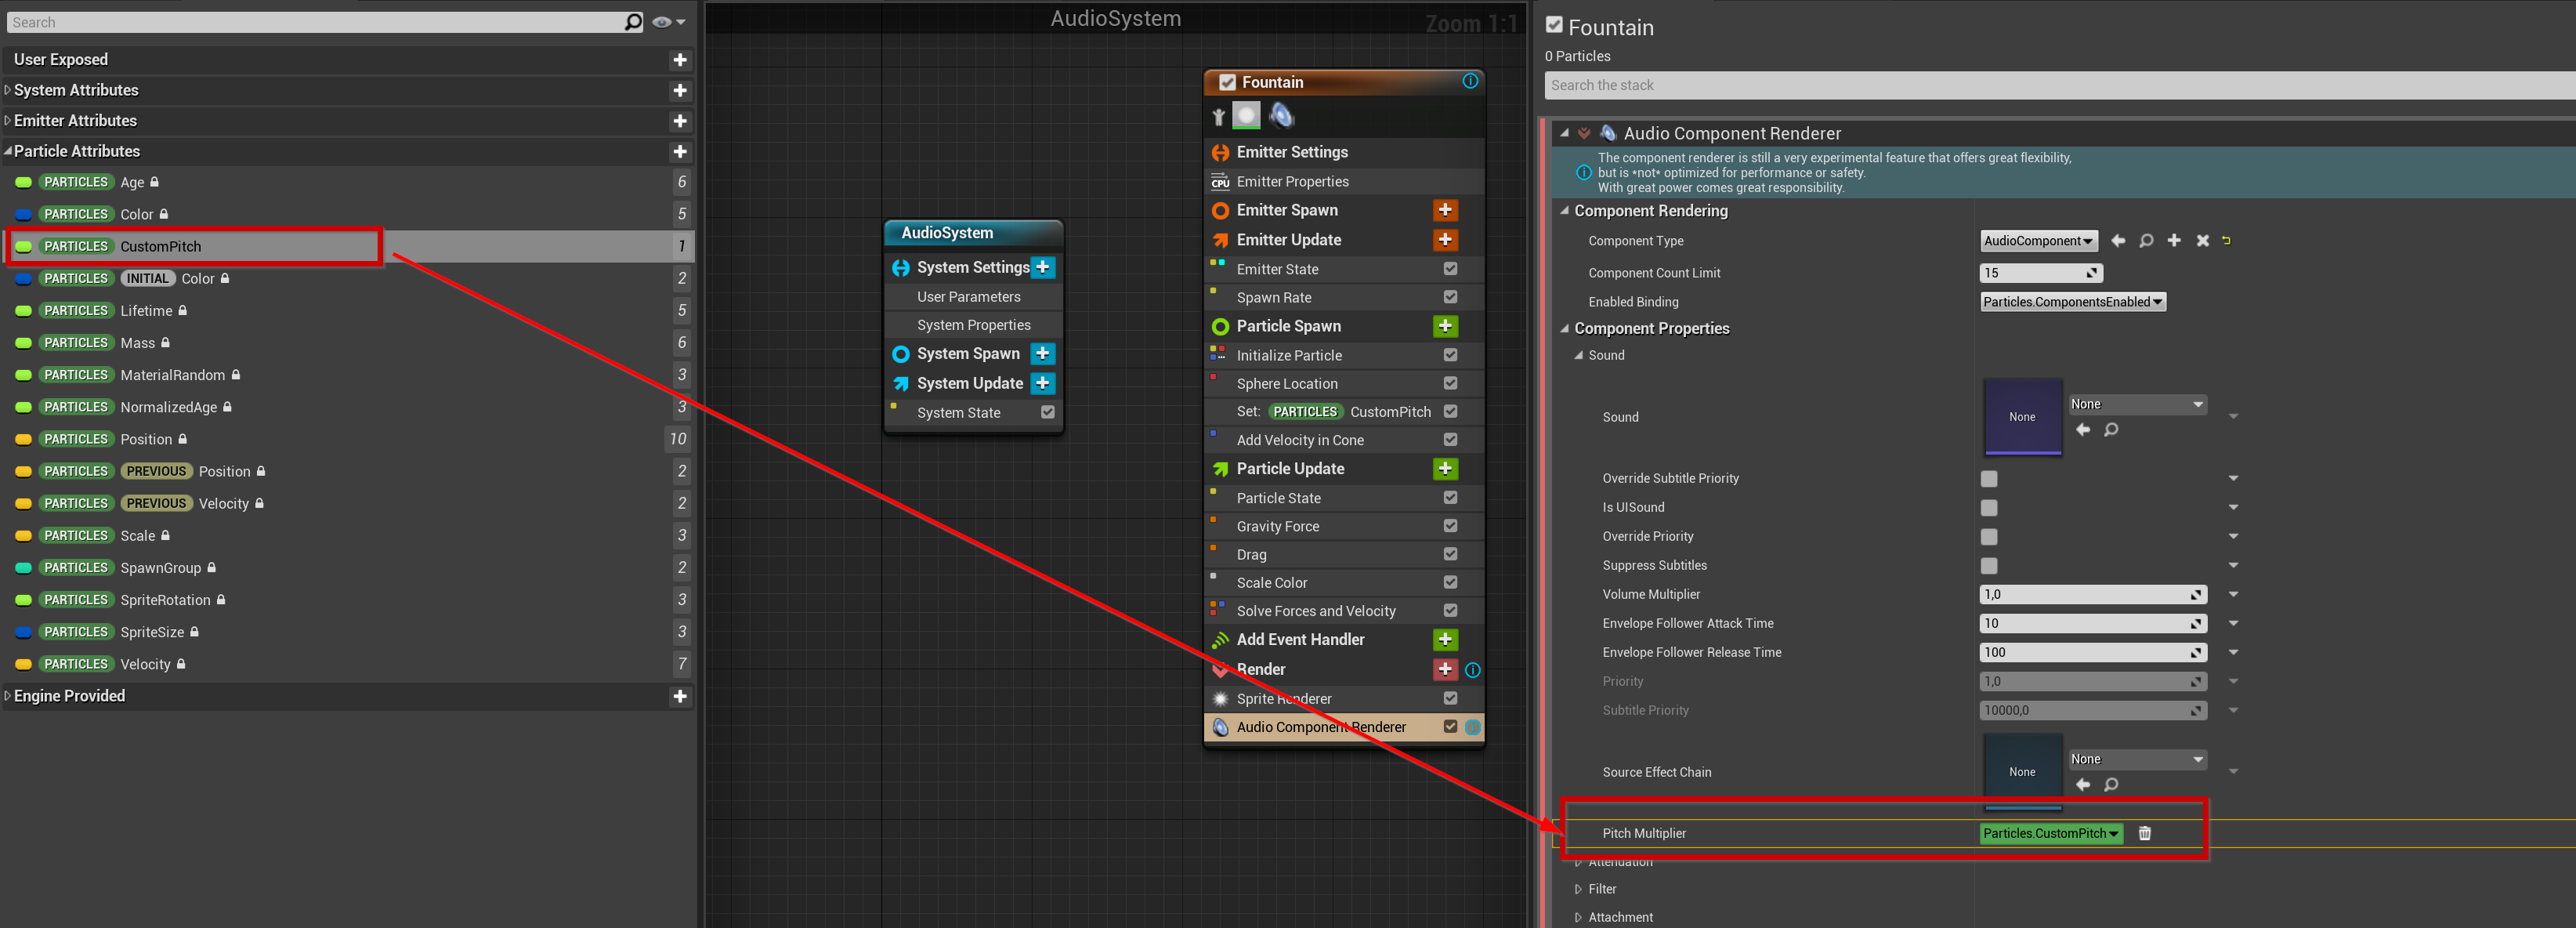
- Add a new Component Renderer to your emitter.
- Set the Enabled Binding to the particle attribute that should start and stop your audio effect.
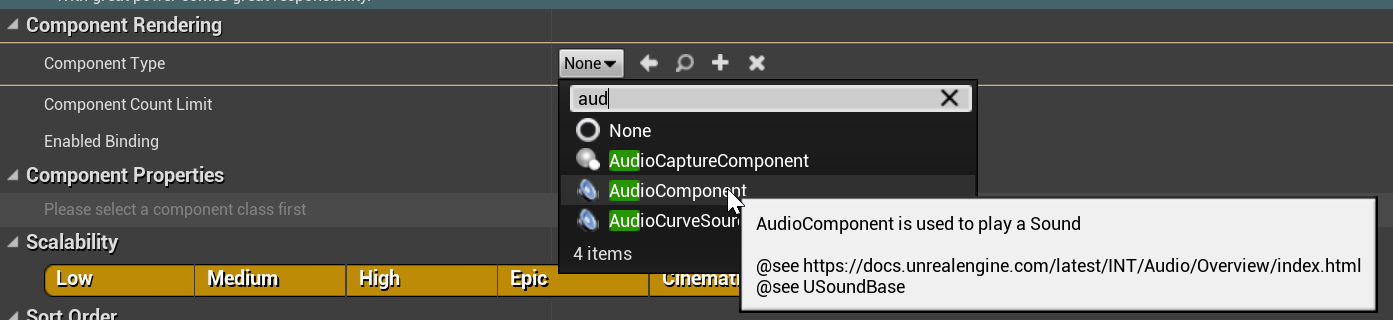
- Select AudioComponent as component type and configure the component properties.
- Bind whatever attribute you want to change during the simulation to the component property.
High quality lights
If you used Cascade before you know that the light module there has a checkbox that allows you to switch between fast "basic" lights and expensive "high quality" lights. The light renderer in Niagara does not have a similar option and can only render basic lights.
But as of 4.26, you can use Niagara's component renderer to also spawn high quality light! Caveat: they are rather expensive, so try to only use them for cinematics or high end settings.
How to set them up:
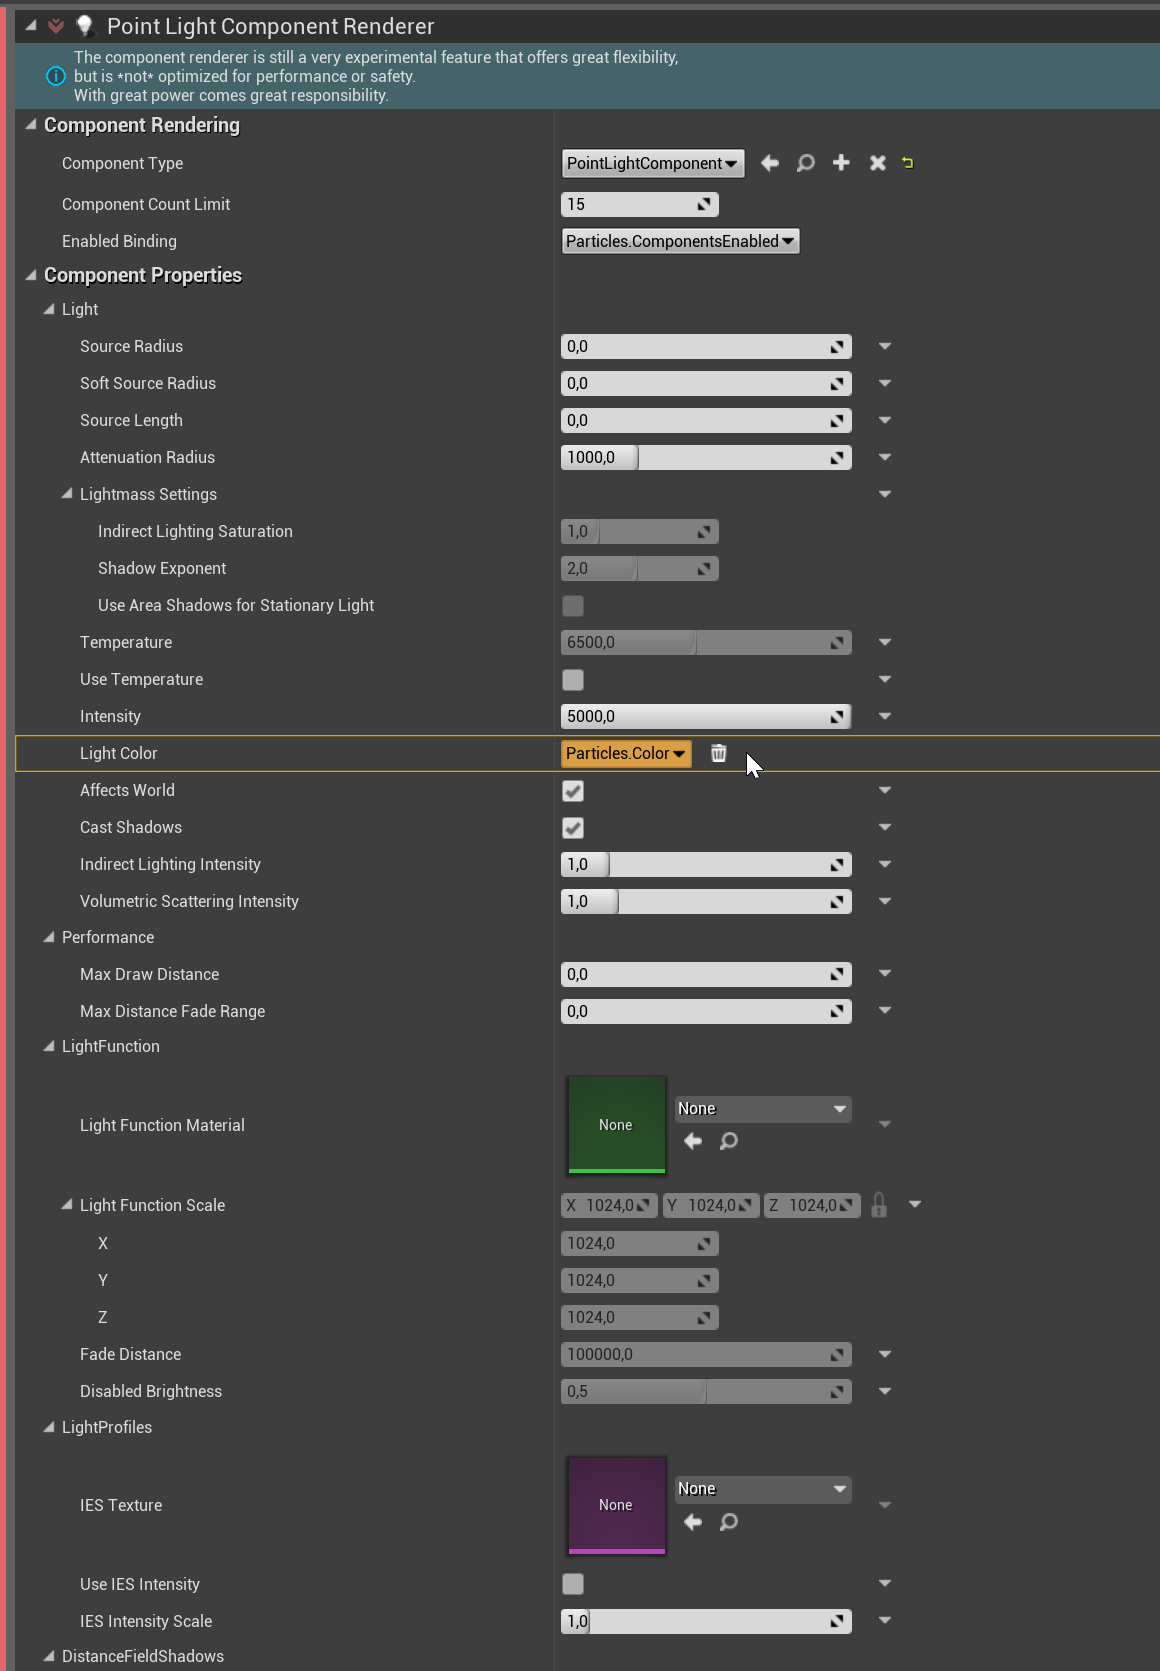
- Add a new Component Renderer to your emitter.
- Set the Enabled Binding to the particle attribute that should determine if the light is active.
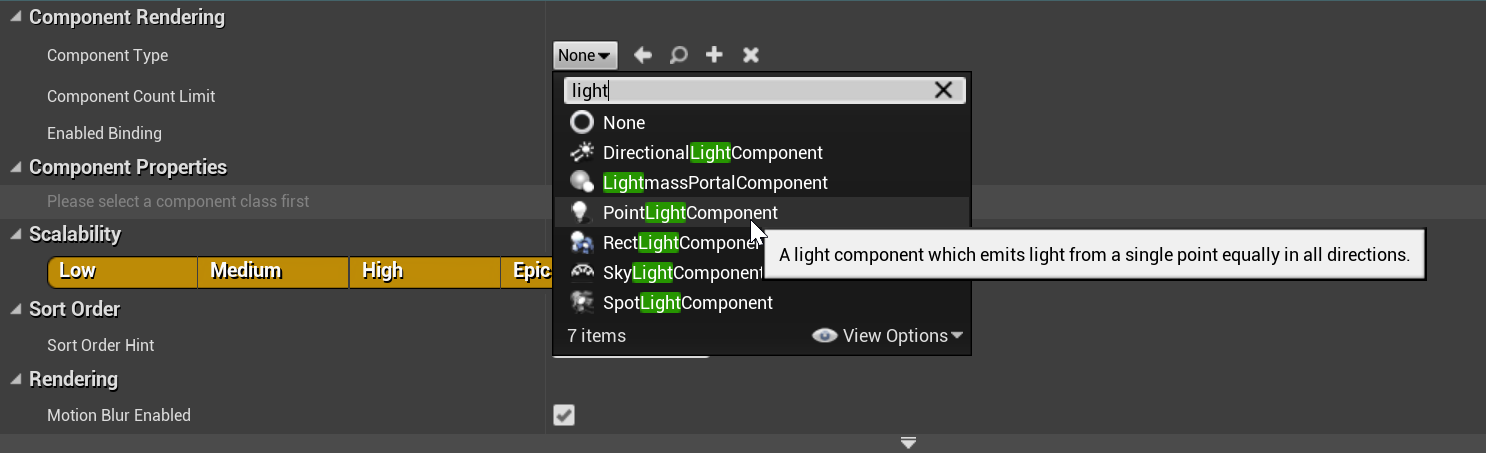
- Select PointLightComponent as component type and configure the component properties.
- (Optional) Bind whatever attribute you want to change during the simulation to the light properties, e.g. particle color.
Pass a value to a material (dynamic material parameters)
Sometimes you want to change the look of your sprite material in a way that is more complex than just color or rotation, so you need to pass a value from your particle simulation to your material.
Maybe you even want to pass a value from blueprint down to the material (since you can't assign dynamic material instances to effects).
How to set this up when passing a value from just the simulation:
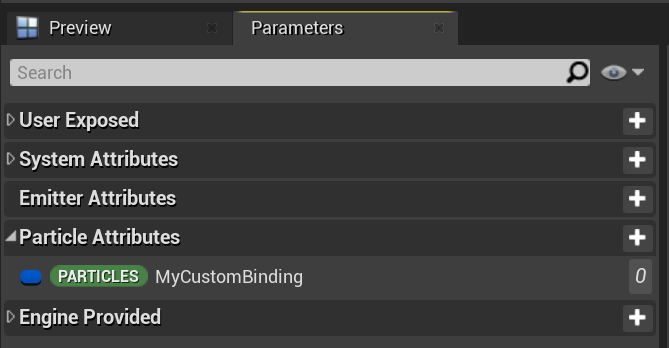
- Add a new Vector4 attribute to your particle attributes. Let's call it "Particles.MyCustomBinding".
- Calculate "Particles.MyCustomBinding" during particle spawn or update (depending on how you want the system to work) to be whatever value you want it to be.
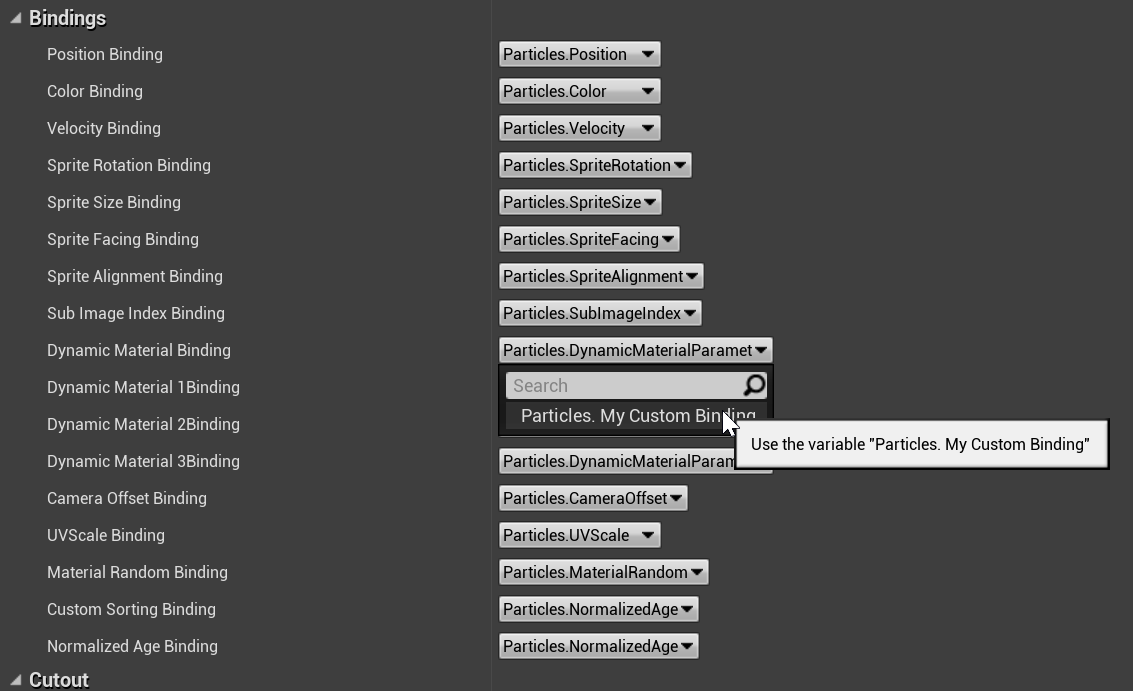
- Select "Particles.MyCustomBinding" from the bindings dropdown of your renderer.
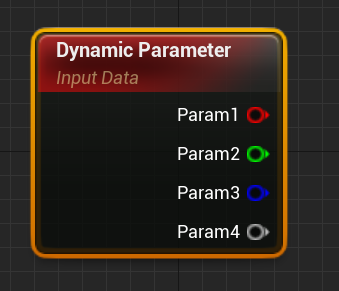
- Use the dynamic input node in your material to get the value set by the renderer.
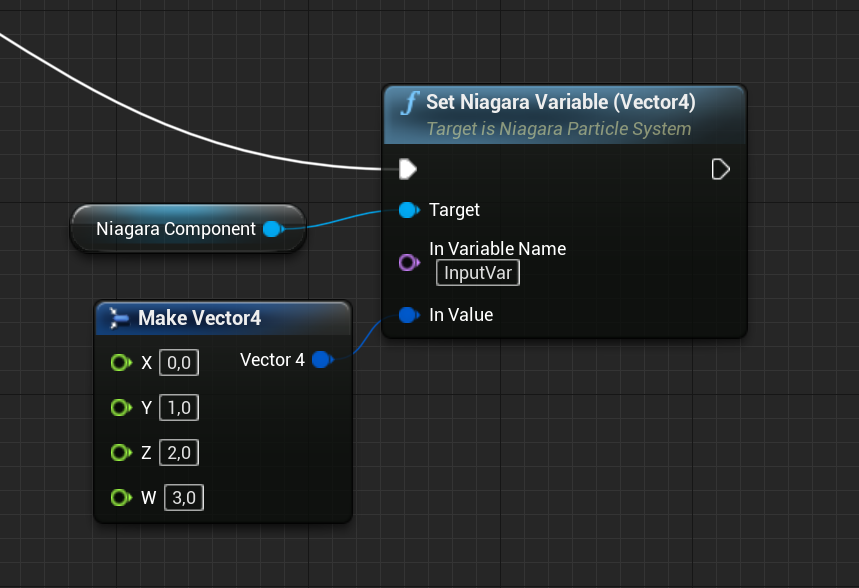
How to set this up when passing a value from blueprint:
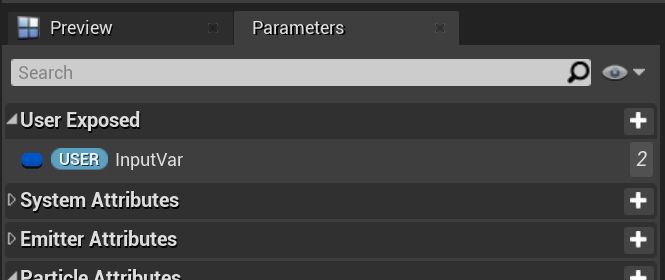
- Add a new Vector4 attribute to your user variables. Let's call it "User.InputVar".
- Add a new Vector4 attribute to your particle attributes. Let's call it "Particles.MyCustomBinding".
- Set "Particles.MyCustomBinding" to "User.InputVar" on particle spawn or update (depending on how you want the system to work).
- Select "Particles.MyCustomBinding" from the bindings dropdown of your renderer.
- Use the dynamic input node in your material to get the value set by the renderer.
- Set the exposed "User.InputVar" variable in blueprint.